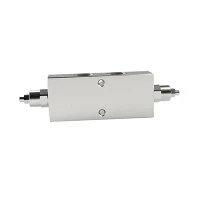
Hey there! As a supplier of Pilot Check Valves, I often get asked about how to adjust the pilot pressure of these valves. It's a crucial aspect of ensuring the proper functioning of hydraulic systems, and I'm here to share some insights with you.
First things first, let's understand what a Pilot Check Valve is. Simply put, it's a type of valve that allows fluid to flow in one direction freely and blocks it in the opposite direction until a pilot pressure is applied. This pilot pressure can be adjusted to meet the specific requirements of your hydraulic system.
Why Adjust the Pilot Pressure?
There are several reasons why you might need to adjust the pilot pressure of a Pilot Check Valve. One common reason is to control the speed of a hydraulic cylinder or motor. By adjusting the pilot pressure, you can regulate the flow of fluid and thus control the movement of the cylinder or motor. Another reason could be to prevent overloading of the system. If the pressure in the system exceeds a certain limit, adjusting the pilot pressure can help relieve the excess pressure and protect the components.
Tools and Equipment Needed
Before you start adjusting the pilot pressure, you'll need a few tools and equipment. These include a pressure gauge, a wrench, and a manual for the Pilot Check Valve. The pressure gauge is essential for measuring the pilot pressure accurately, while the wrench is used to make the necessary adjustments. The manual will provide you with specific instructions on how to adjust the pressure for your particular valve.
Step-by-Step Guide to Adjusting the Pilot Pressure
Step 1: Prepare the System
Start by shutting down the hydraulic system and relieving any pressure in the lines. This is a crucial safety step to prevent any accidents or injuries. Make sure to follow the proper procedures for shutting down the system as outlined in the equipment manual.
Step 2: Locate the Adjustment Screw
The next step is to locate the adjustment screw on the Pilot Check Valve. This screw is usually located on the top or side of the valve and is used to increase or decrease the pilot pressure. Refer to the valve's manual if you're having trouble finding it.
Step 3: Connect the Pressure Gauge
Connect the pressure gauge to the pilot port of the valve. This will allow you to monitor the pilot pressure as you make the adjustments. Make sure the connection is secure to prevent any leaks.
Step 4: Make the Initial Adjustment
Using the wrench, turn the adjustment screw slowly. Turning the screw clockwise will increase the pilot pressure, while turning it counterclockwise will decrease it. Make small adjustments at a time and monitor the pressure gauge to see the effect of each adjustment.


Step 5: Test the System
Once you've made the initial adjustment, start the hydraulic system and test its operation. Check if the system is functioning as expected. If not, you may need to make further adjustments to the pilot pressure.
Step 6: Fine-Tune the Pressure
Continue to make small adjustments to the pilot pressure until you achieve the desired performance. This may take a few tries, so be patient and take your time. Remember to monitor the pressure gauge closely during the process.
Tips for Adjusting the Pilot Pressure
- Always refer to the valve's manual for specific instructions. Different valves may have different adjustment procedures, and it's important to follow the manufacturer's recommendations.
- Make small adjustments at a time. This will help you avoid overshooting the desired pressure and make it easier to fine-tune the setting.
- Keep an eye on the system's performance. If you notice any abnormal behavior, such as excessive noise or vibration, stop the system immediately and recheck the pressure settings.
Related Products
In addition to Pilot Check Valves, we also offer a range of other hydraulic valves that may be useful for your system. Check out our Safety Relief Valve, Buffer Valve Flow Control Valve, Orbital Hydraulic Motor Safety Valve, Buffer Valves, and Hydraulic Parts Buffer Valve. These valves can provide additional functionality and protection for your hydraulic system.
Conclusion
Adjusting the pilot pressure of a Pilot Check Valve is an important task that requires careful attention and precision. By following the steps outlined above and using the right tools and equipment, you can ensure that your hydraulic system operates smoothly and efficiently. If you have any questions or need further assistance, don't hesitate to reach out. We're here to help you find the best solutions for your hydraulic needs. Whether you're looking for a new Pilot Check Valve or need help with adjustment, we're just a message away. Let's start a conversation and see how we can work together to meet your requirements.
References
- "Hydraulic Systems Handbook", published by Industry Publishing.
- Manufacturer's manuals for Pilot Check Valves.